
Blog Information
- منشور من طرف : Baby wu
- نشر على : Feb 21, 2022
- الآراء : 191
- الفئة : السفر
- وصف : This lesson will demonstrate how to cut, drill, and machine acrylic and perspex, as well as how to bind and assemble acrylic and perspex
نظرة عامة
This lesson will demonstrate how to cut, drill, and machine acrylic and perspex, as well as how to bind and assemble acrylic and perspex. Additionally, the finest equipment for cutting, drilling, and gluing acrylic and perspex are supplied.
Acrylic plastic is a flexible substance that is unaffected by prolonged exposure to sunlight or chemical reactions with sea spray or water. It is a flexible insulator that is resistant to a wide variety of chemicals.

A thicker acrylic or Perspex sheet can be utilized for a variety of applications, including bath and basin splashbacks and shelves. Acrylic and Perspex are available in a range of thicknesses from 1.5mm to 25mm.
Acrylic or Perspex sheeting (with Pictures)
Acrylic can be cut in a variety of ways, however cutting it requires a saw with fine teeth. Acrylic can be cut with a hobby knife, but good cutting requires many cuts. After that, the acrylic can be bent over a straight edge, just as ceramic tiles are cut. The open market is awash with specialty blades designed specifically for cutting acrylic plastic. If none of these blades are available, fine toothed blades will suffice. Utilize a saw that has approximately ten teeth per inch of blade width.
Prior to cutting acrylic with a jigsaw, verify that the cutting speed of the saw is as fast as possible. Cutting straight lines with a clamped straight edge is more convenient and precise. The Jig Saw is the optimal tool for cutting curved surfaces in acrylic and other materials. While hand saws can be used, the faster cutting motion of a Jig Saw results in a more consistent and flawless finish.
Forcing a cut will cause the acrylic to overheat, resulting in the cut edge melting or disfiguring. Allow this protective layer to remain on the acrylic for as long as possible to protect the completed surface.
With wet and dry paper or fine sandpaper, smooth the edges of the cut pieces.
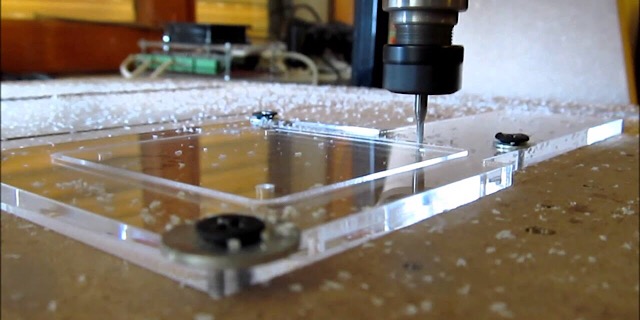
Drilling Acrylic or Perspex
Use a high-speed steel (HSS) drill bit while drilling acrylic. Begin with a small drill bit and gradually increase the size (see below for details on pilot holes). Allow the drill bit to cut through the acrylic sheet naturally, not with force. Reverse the drill if the drill bit becomes trapped in the acrylic sheet. Kindly refrain from removing it.
Titanium-coated drill bits are an excellent choice for this and other applications. Click on the link below to get a set of titanium coated drill bits for drilling acrylic and plastic.
Place a wooden block or sheet beneath the acrylic sheet prior to drilling to prevent the bit from breaking through the bottom. This will prevent the wood from splitting and cracking. Always drill a small pilot hole initially to ensure proper alignment.
Lubrication is recommended if your acrylic is thicker than 14 inches. Water will suffice in this case. When drilling a hole for a screw or bolt, it is important to counter sink the hole to ensure that the screw or bolt is buried completely beneath the surface.