Wisata Pulau Seribu » Discussions
How to Get Started with FPV Drone – The Complete Beginner Guide
-
 So you are new to FPV drones and wondering where to start? You have come to the right place! This is the first tutorial you should read on this blog, it explains the basics of buying, building and flying an FPV drone for beginners.
- Get Started with FPV – The Short Answer
- What is FPV Flying?
- Flying FPV Drones as Hobby
- How Much Does It Cost?
- Get a Taste of Flying in Simulators
- FPV Drone Overview
- FPV Drone Sizes
- Flying Style
- FPV Drone Kit for Beginners
- Building From Scratch or Buy Pre-Built?
- Parts and Equipment
- Software Setup
- How Does FPV Drone Work?
- FPV System Explained
- Learning How to Fly FPV Drones
- Don’t Fly Auto-Level Mode
- Attending Meetup and Race Events
- Safety Rules for Flying FPV Drones
Get Started with FPV – The Short Answer
I strongly recommend going through the whole tutorial, but if you are feeling impatient, here are the steps to learn about flying FPV drones.
- Step 1: Buy a radio for playing in FPV simulator (see my radio recommendations here)
- Step 2: Download an FPV simulator of your choice (see my FPV sim recommendations here)
- Step 3: Practice in FPV sim, get enough flight time until you feel confident. I think 100 hours or more would be ideal. Meanwhile, study and research the type of drone you want to build/buy
- Step 4: Build or buy your first FPV drone or beginner drone kit, ideally something durable. Get 100+ crashes under your belt before seriously investing in something more premium/expensive would save you money
Need help? Just comment down below, but it’s always best to google first, or search on youtube and use our forum:
What is FPV Flying?
FPV stands for First Person View.
By streaming real-time video from the camera on the drone, you are flying like a bird! It’s like you are sitting in the cockpit of the aircraft while controlling it, but your feet are actually firmly on the ground.

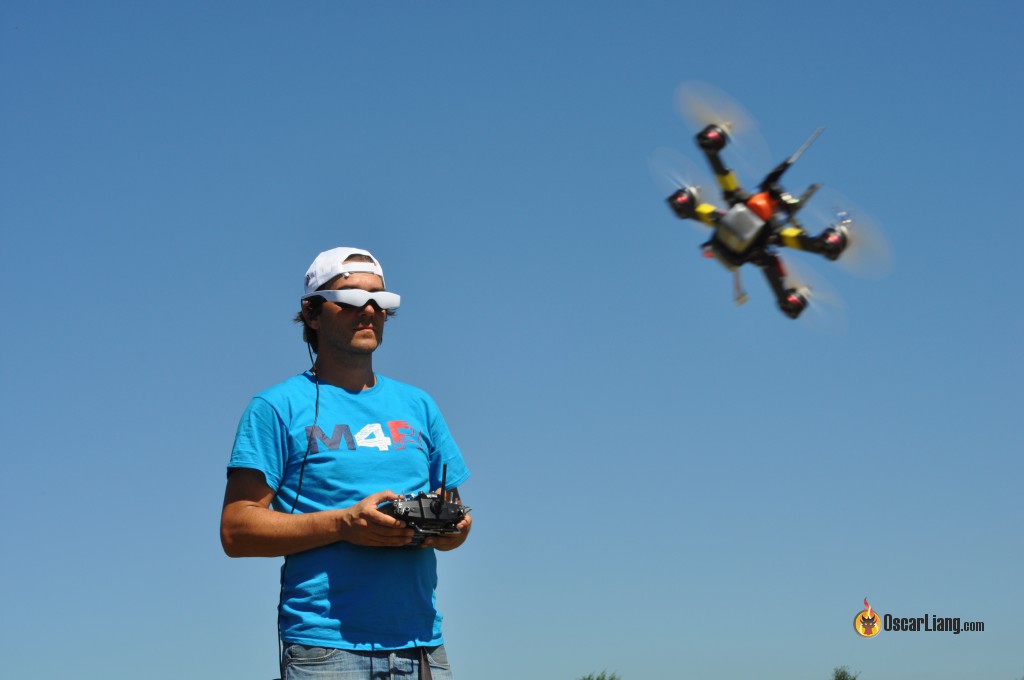
FPV Drone, flying with goggles, you can see what the drone sees
Flying an FPV drone is the most surreal experience I’ve ever had. You can go anywhere in 3D space, what you can do is totally up to your imagination.

It’s almost like playing a video game, but if you crash in the game, your PlayStation isn’t going to hit your lounge wall at 90MPH! Believe it when we say, replacing a top tier FPV drone can be just as expensive as a new PlayStation (if not more).
The level of focus required while flying FPV is intense, and the speed and maneuverability of an FPV drone make it a truly sensational experience every time I fly.
Traditionally we fly RC models by looking at them directly without any FPV equipment, which we call “line of sight” (LOS).
Flying FPV Drones as Hobby
More and more FPV drone pilots are now flying drones on a professional level (racing and video making), but the majority of us just fly them on our days off as a hobby.
The FPV drone hobby has some of the friendliest online and offline communities I have ever experienced. Everybody helps each other out, and our local group regularly meet, fly and race together.

A group of friends racing together in a park
With the help of this guide, you learn to choose parts, build and repair your own quadcopter. You will also learn to tune it to fly exactly the way you want it to. Everything in this hobby is highly customizable and upgradable.
How Much Does It Cost?
You don’t have to spend a lot to fly FPV. You can start by just buying a radio controller and a simulator to practice flying.
Owning your first FPV drone is not as expensive as DJI camera drones, but still it’s not exactly cheap either. To give you some idea:
- Radio controller + Simulator = $100 to $400
- FPV Goggles from $200 to $600
- FPV Drone = from $100 to $400
- Batteries, charger & other accessories = from $100 to $400
If custom built FPV drones are too expensive for you, there are also complete bundles you can buy (RTF Kits). They include all the components you will need to start flying for a much more affordable price. I will talk about this in a bit more detail later in this article.
Get a Taste of Flying in Simulators
You don’t need a drone to learn flying FPV, you can practice in FPV simulators.
I strongly recommend getting some flight time in a simulator before buying your first drone.
Crashing is almost impossible to avoid when you are just starting out, so crashing virtually in a simulator will save you both money and time to repair your broken drone. The physics of modern FPV simulators are exceptionally realistic, the transition from a simulator to a real FPV drone is relatively indistinguishable.
Simulators can teach you the basic controls of a drone, and the muscle memory your hands require. You will also be able to use the same radio transmitter to fly the simulator and the real drone if you follow my recommendations.
AVOID learning how to fly on a full size 5-inch drone, you will crash a lot in the beginning, not only it’s dangerous, it’s going to be expensive if you crash and damage it. As you practice more, muscle memory will take over and you will crash less. Practicing in a sim in advance can accelerate that process and prepare you for it.
Here is a list of FPV flight simulators for Drone.
FPV sims are all excellent in their own ways. If you have a decent gaming PC I’d probably recommend Liftoff and DRL, and if your computer isn’t great, then Velocidrone is more likely to work well. Sims like Liftoff and Velocidrone have built-in tutorials to help you learn how to fly and learn Acro mode, which is what you really need.

FPV sims are probably the cheapest way to get into quadcopter flying. You can practice anytime of the day regardless the weather. It’s not exactly like flying in real life, but it’s close enough as basic training. I recommend spending 5 to 10 hours in a simulator before attempting to fly a real drone, this will help you tremendously as a complete beginner.
To fly FPV simulators, the first item you should buy is a radio controller that supports FPV simulators. That means USB HID / joystick support that is plug and play without any dongles or adapters. You can use the same transmitter to fly your drone later.
Here are my radio recommendations.
Don’t use XBox console or keyboard because it’s pointless. Only using a proper transmitter will build up muscle memory and provide the full benefit of the training.
FPV Drone Overview
Let’s cover the basic terms used in this hobby to avoid any confusion later on.
What is a Drone?
The word “drone” is being used a lot these days and has become synonymous with any unmanned aircraft with an onboard camera, and sometimes a camera is not even necessary for the title! Other than for military use, most “drones” were historically used for aerial photography (AP) and were large with a heavy payload capacity for carrying cameras and equipment.
Here is a list of drones that are commonly seen in this hobby.
What is a Multirotor?
The word Multirotor (or Multicopter) covers anything that is a “copter” with more than 1 main motor or propeller. For example, a “tricopter” has 3 motors / rotors, a “quadcopter” has 4, a “hexacopter” has 6 etc. But these are all “multirotors”.
Here are the different configurations of multirotors.

What is a Mini Quad?
A Mini Quad is basically a small multirotor, or more specifically, a quadcopter. But most people call them FPV drones these days.
Mini quads are designed to be fast, nimble and crash-resistant, so even when you crash you can usually just pick it up and take off again. This resilience gives pilots the confidence to fly faster, through smaller gaps, and constantly push their limits to the next level.
Since this fantastic invention, we’ve seen huge progress in the power of FPV drones, increasing propeller sizes, higher battery voltage, larger motors, all coming together to give insane power-to-weight ratios of over 15:1! Turning these little toys into insane rockets, the fastest racing drone in the world is capable of reaching 180mph(~290Kmh) in a matter of seconds.
What is a Micro Quad?
A micro quad is basically an even smaller mini quad that have 3” or smaller, with a frame size (wheelbase) of 150mm or less. There is no rules really, if it’s small, it’s a micro quad :)

5″ Mini Quad on the left, 2″ Micro Quad on the right
FPV Drone Sizes
The size of an FPV drone is determined by the maximum propeller size it supports. For example, a 3″ drone is designed to spin 3″ propellers.
As your first build, I strongly recommend building a 5″ mini quad because it’s the most versatile platform for both freestyle flying and racing. It’s the most popular size, so advice and build logs can be easily obtained online.
The size of FPV quads have changed quite a bit throughout the years. At the beginning, 6 inch quads were the normal. Then came 5 inch, which became the common face of FPV for a long time, and is still likely the most popular.
But as electronics get smaller and regulatory laws change, smaller drones are gaining more and more attention and popularity. The trend now is going smaller.
Of course, there is always exception to the trend. Long range has brought back 6-7 inch quads. And X-class and Beast class have made 12-13 inch quad popular. It is even hard to call the latter two “mini quads” anymore.
5-Inch

Pretty much the standard for FPV drone nowadays, excellent balance between power, efficiency, and agility, it’s great for both freestyle and racing, and even long-range. Components are larger, therefore easier to solder and maintain.
I have tutorials that show you how to build 5″ FPV drone step-by-step: How to Build an FPV Drone Tutorial (DJI & Analog)
Typical build: 4-6S lipos 1000mah-1800mah, 22xx-25xx motors 1600-2800kv
4-Inch

4 inch is the middle child. This category started to get more attention when the 250g weight limit was introduced in some countries, while the 4″ is the biggest size that can achieve that without impacting performance too much.
However when building and choosing parts for a 4″ you have to be careful, because there is no parts that are specifically designed for 4″, and you have to use parts either from a 5″ or a smaller 3″.
This results in the lack of standard when it comes to motor mounts and flight controller stack size. Some frames use 13xx-15xx motor while other uses 18xx-22xx motor. (What’s Motor Size) The same goes for the stack, some uses 20mm stack while other uses 30mm stack (flight controller mounting explained).
Typical build: 3-4s lipos 600-900mah, 13xx-15xx or 18xx-22xx
2-Inch, 2.5-inch and 3-Inch

2″-3″ is becoming very popular, due in part to regulatory law that makes you register any quad over 250g. The other reason, electronics are getting smaller and more reliable, these small drones can do pretty much anything a 5 inch drone can do.
Typical build: 2-4S lipos 300-800mah, 13xx-15xx
Tiny Whoops

Tiny Whoops are ducted micro drones that typically have a 55mm-75mm diagonal (wheelbase)
They run on 1S or 2S batteries which means they are relatively low in power. The built in prop guards (aka “ducts”) can protect people and your TV from props and let you bounce off stuff and recover, great for flying in the living room.
On the flip side, the ducts make them heavier and reduces performance, making them less ideal for outside and windy use.
Most people fly them in Angle mode (stabilized mode) and race them that way too, but they’re not nearly as good for flying in Acro – which is the ultimate goal of flying outside and doing freestyle/racing on full size quads. So Tiny Whoops are fun toys and a good way to start, but a less great way for long term progress.
A typical tiny whoop weighs only around 20g including battery, and they are great fun to fly in the house, and great tools to learn flying with. Here are what I think the best tiny whoops are currently on the market.
Typical build: 1S LiPo 300-350mah, 06xx-08xx motors brushless or brushed motor
Ultralight (toothpick)

The ultra-light (or toothpick) class gets its name from the frame looking like a bunch of toothpicks tied together. As you can probably guess, they are not made to withstand crashes, but to get the most performance out of them. But they are actually pretty crash resistant because they are so small and light.
They are also very quiet, as to not annoy people and pets, and when flown on 1 to 3S batteries, typically still pretty safe around people even though they don’t have prop guards.
They can range in performance from “tame” to “extreme” – some of them can approach the level of performance in a traditional 5″ prop mini quad in terms of power to weight and sheer speed.
I have a tutorial explaining the considerations that go into choosing parts for a Toothpick build.
You can buy one pre-built and I tested a bunch to find out which is the best.
Cinewhoops
These are 3″ or smaller drones that are equipped with propellers protectors (ducts), and carries an HD camera like the GoPro for capturing cinematic footage. They are designed for slower and smooth flights, not for freestyle and acro flying.
Learn more about cinewhoop in this post.

6 Inch and 7 Inch

This category of quad is making a comeback due to the gain in popularity of long-range flying. It is not to say that you cannot use these for freestyle. These quads are not as agile as a 5 inch and tend to be “more floaty”. The components vary quite a bit for this category depending on the style of flying you want to achieve.
Typical freestyle build: 4-6S lipos 1000-1800mah, 6-7 inch props, and 22xx-25xx motor 1500-2400kv
Typical long range build: 4-6S lipos 1500mAh or li-ion 3000mAh, 22xx-23xx motor 1300-2100kv, equipped with GPS, barometer, 433MHz or 900MHz radio system
X-Class and Beast Class

X-class and Beast class quads are the biggest in this list, and they are similar.
For a quadcopter to be considered an X-Class, the frame size should be between 800mm-1200mm (diagonal motors distance). The props size generally are 9-13 inches. X-class was created for spectators to be more easily see visually during the race. That’s because the smaller 5-inch FPV drones, which most race events are held for, are extremely difficult to view from the stands.
Beast class uses all the same components of an X-class, but it uses a smaller, sub-800mm frame. Beast class is supposed to perform more like a 5-inch quad than X-class.
These types of quads are not recommended for beginners at all. They are expensive to build and maintain, and they are very dangerous. Remember, with great power comes…..
Typically build: 8-12S lipos 4000-5000mah, 9-13 inch props, and 3xxx-4xxx motor.
Cinelifter
Octocopter in X8 configuration (just like a quadcopter, but each arm has two motors, so 8 motors in total), usually running 6-8″ propellers. These are designed to carry expensive high end cameras for professional shooting.
Flying Style
Before choosing parts for your drone build, you should recognize what flying style the drone is designed for. The common flying styles are:
- Freestyle
- Racing
- Long range
- Cinemaphotography (cinematic)
Although not all sizes can achieve all the styles, but people still try.
Freestyle is the most popular for hobbyists. It is about free flying and doing tricks. There is no rules to how you can fly, the sky is the limit. And also, the ground, so try not to crash :)
Racing is flying through a designated course. Usually consisting of gates that you have to go through. Drone Racing is like racing roller-coasters, just without the tracks. Get the most powerful parts that can take abuse while keeping the weight to minimum, this is what FPV racing is about (plus the skills).
Long Range is trying to achieve long distance flight. With this style it’s mostly low key cruising, trying to be steady with throttle to minimize current draw and maximize flight time and distance. Here are some tips to long range flying.
Cinemaphotography in FPV (or cinematic flying) is usually referred to a relaxed flying style without too much acrobatic moves in epic locations such as mountain, over water etc. There is no specific build for cinematic flying, it all depends on the job. Popular builds for making cinematic footage are:
- 3″ Cinewhoop
- 2″ Naked GoPro builds
- Regular 5″, 6″ or 7″ carrying GoPro, using Hypersmooth or Reelsteady for stabilization
FPV Drone Kit for Beginners
This Hobby is expensive. My FPV Goggles cost me $500, the radio setup costs me $250, the custom built drone costs $300… and what if you realize you don’t like the hobby after all?
Introducing complete RTF (read to fly) kits that are affordable, and they come with absolutely everything you need to start flying: the drone, radio, FPV goggles, battery and charger.
I most recently reviewed the BetaFPV Cetus FPV Kit and it’s a pretty good setup. Don’t even rush to fly the drone, you can connect the included radio controller to your computer and fly FPV simulators such as DRL, Liftoff and velocidrone. Once you get a hang of it in the sim, you should have no problem flying the Cetus micro drone in the house.
Once you outgrow the Cetus drone, consider upgrading to the Emax TinyHawk II Freestyle, it’s great value and flies pretty well. At this point you will have a perfectly functional FPV setup and a well perform micro quad for outdoor flying.

HOWEVER, the problem with RTF kits like these, as good as they are – is that the goggles and the radio controller lack features and are relatively low quality. They work, but won’t give you the full experience. And you will probably soon outgrow them, meaning you will probably end up spending money again. If you have the budget and are confident that you will stay in the hobby, buy the best possible goggles and radio you can afford, so you don’t need to replace them later.
Building From Scratch or Buy Pre-Built?
Almost everyone flies a 5″ drone at some point in their FPV career, because it just flies SO GOOD! You have two options:
- Build your own FPV drone
- Buy a ready-to-fly FPV drone
If building a quadcopter from scratch sounds too challenging, there’s an abundance of choice for ready-to-fly quads that perform extremely well. However I do recommend building your first drone for the following reasons:
- The skills and knowledge you will learn from building your own FPV drone can enable you to diagnose, repair and upgrade your FPV drone later on
- Every pilot has specific needs, you can get exactly what you are looking for from picking your own parts
There are now DIY kits, which has everything for you to build. These kits tend to be the lowest quality, but they are also the cheapest and enough to get you started with learning how to build and fly, this is perhaps adequate if you want to spend the absolute minimum. But if you want quality, you should get the parts separately from my recommendations.
You could buy a BnF (bind and fly) that’s already built, and ideally, tuned as well! All you need to do is bind it to your radio, and go. I generally prefer buying BnF’s, and modifying them to suit my needs better or improving them. It saves time from building your own. But almost no BnF is perfect, and the closer they are to perfect, the more you pay, eventually. And, if you break it… you’re going to need to take it apart anyways, and solder, and learn how to fix, and so on… So even if you buy a BnF… eventually, you’ll probably have to learn how to build.
For these reasons, I would recommend building your first quad. Once you know the in’s and out’s, you can then do whatever you want :)
Whether you are buying a pre-built drone or building it yourself, you should make a shopping list, and have it checked by someone experienced. If you want some advice on selecting components, ask on my forum IntoFPV forum. We have a wealth of experienced pilots and are always ready to welcome new members and answer questions.
Parts and Equipment
Must reads:
- How to build an FPV drone – explains how to build a quadcopter from scratch
- FPV Acronyms – A list of common technical terms and acronyms used in FPV
Here is the anatomy of an FPV drone:

An FPV drone consists of the following parts, I have a buyer’s guide for each component:
- Frame: a structure where all the components sit on and provides protection to the electronics – how to choose an FPV drone frame
- FC (Flight Controller): the brain of a drone, it has sensors that takes measurements and processor that runs all the calculations – how to choose a flight controller
- 4x Motors – how to choose FPV drone motors
- 4x Props (Propellers) – 2x CCW and 2x CW rotations – how to choose propellers
- 4x ESC’s or 1x 4in1 ESC (Electronics Speed Controller): it takes signal from the flight controller, and control the speed of the motors – how to choose ESC’s
- LiPo Battery – how to choose LiPo battery
- FPV Camera – how to choose an FPV camera
- Video Transmitter (VTX) – how to choose a VTX
- FPV antennas – how to choose FPV antennas

Additionally you will also need the following equipment to fly your quadcopter in FPV:
- Radio transmitter (TX) and receiver (RX) – how to choose a radio transmitter
- FPV Goggles – how to choose FPV goggles
- LiPo Charger – how to choose LiPo charger
- Beeper with built-in battery
When starting out you can get by with just a few basic tools, just to name a few:
- Soldering iron and solder
- A set of hex drivers or Allen keys (sizes dependent on your frame choice)
- An M5 (8mm) nut spinner or ratchet for your propeller nut (or you can just use your big pliers)
- Wire Cutters
- Cable ties
- Electrical Tape
- Multimeter
- Smoke stopper
There are many other useful tools you can consider to have which will make building and repairing your quads more enjoyable!
Choosing Parts
This can be tough for your first build. If you are not sure what to get, it’s a good idea to get what’s popular so if you run into problems, there are more people who might have the answer. Do your research and if in doubt, ask on our IntoFPV forum!
Take a look at the gear I use and quads I fly, this might give you some ideas.

Getting LiPo Batteries and Charger
For LiPo batteries, typically a 4S 1500mah on a 5″ drone would give you 5 to 7 minutes of flight time. You can start with a set of 4 batteries for practicing, but you will probably need more later on as you improve and want to fly longer.
- Batteries Recommendation: https://oscarliang.com/best-4s-6s-lipo-batteries/
- Charger Recommendations: https://oscarliang.com/best-lipo-battery-chargers/
Getting a Backpack
Get a backpack designed specifically for carrying your drones and all your gear for flying: https://oscarliang.com/product-3brn
Software Setup
After finishing your build, you’d want to configure the drone before flight. There are two components you want to configure, the flight controller and the ESC. You will need to download two different software to configure them because they are running different firmware.
I have tutorials that dive into detail how to do software setup, just do a search on my blog, or follow instructions in one of my build guides. For example this guide for Betaflight: https://oscarliang.com/betaflight-firmware-setup/
The most popular flight controller firmware is Betaflight, and the most popular ESC firmware is BLHeli_S or BLHeli_32 depends on the hardware you have. You can’t go wrong with these choices. Anyway here I will give you an overview of the firmware we use in the hobby.
FC Firmware
There are quite a few flight controller firmware available for FPV drone, but it doesn’t matter, just use Betaflight – this is probably what 95% (just a guess) of the people in the hobby use. It’s free, open source, performs very well and being updated frequently. It supports virtually every flight controller available on the market (or should I say most FC are made for Betaflight?). Apart from freestyle and racing, Betaflight has added features geared for long range.
KISS (close source) is another popular firmware that is very easy to setup and flies very well. You will need to purchase KISS specific hardware to use their firmware.
iNAV (open source) is very popular with long-range and autonomous flyers. They do not support as many flight controllers. -
June Havens (Cameron Diaz) and Roy Miller (Tom Cruise) collide with each other at an airport. best drone for under 200