


More from ashir team

More in Politics

Related Blogs

Archivo
compartir social
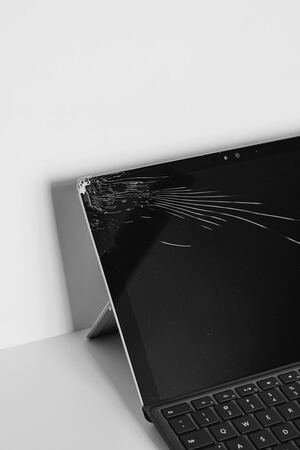
How to Repair or Replace a Damaged Laptop Screen: A Complete Guide
Cuerpo
Introduction: Importance of a Laptop Screen
A laptop screen is more than just a piece of glass—it's your gateway to the digital world. Whether you're working on an important project, binge-watching your favorite series, or catching up with friends online, a clear and functional screen is essential for a seamless experience. But what happens when that vital component gets damaged? A cracked display can turn your productivity into frustration in seconds. Understanding how to repair or replace it not only saves you money but also empowers you to take charge of your tech issues confidently. Let’s dive into the signs of damage and explore practical steps for getting your laptop back in prime condition!
Signs of a Damaged Laptop Screen
A laptop screen damage can be a frustrating experience. Recognizing the signs early can save you time and money.
Look for cracks or chips on the surface. These are obvious indicators that something is wrong. Even small blemishes can interfere with your viewing experience.
Next, pay attention to display issues. If you notice flickering images or strange colors, it could signal internal damage or connection problems.
Another red flag is discoloration. Dark spots or lines running across the screen often indicate a more serious issue beneath the surface.
If your screen becomes unresponsive to touch commands (in touchscreen models), this might mean it's time for repairs or replacement.
Being aware of these symptoms helps ensure you're not left in the dark when using your device!
Steps to Repair a Damaged Laptop Screen:
Before diving into repairs, ensure your safety. Power down the laptop and unplug it from any power source. Remove the battery if possible to avoid electric shocks.
Next, assess the damage carefully. Look for cracks, dead pixels, or discoloration. Understanding the extent of the damage helps you determine whether a simple fix will suffice or if a full screen replacement is necessary.
Gathering tools is crucial. You'll need a screwdriver set, plastic prying tools, and possibly adhesive strips for reassembly. Having everything on hand makes the process smoother.
If you're confident in your skills, follow online guides specific to your laptop model for step-by-step instructions on replacing the screen yourself. Patience is key; take your time with each step to avoid additional damage during installation.
- Safety Precautions
Before diving into any repair work, prioritize your safety. Start by unplugging the laptop and removing the battery if possible. This prevents accidental power surges during your repair.
Wearing protective eyewear is essential. Tiny glass shards can pose a risk when handling damaged screens. Gloves are also a good idea to shield your hands from sharp edges.
Work in a well-lit area with plenty of space. A clutter-free environment minimizes distractions and helps you focus on the task at hand.
Make sure you're grounded to avoid static electricity buildup, which can damage sensitive components inside your laptop. Use an anti-static wrist strap or frequently touch a metal object like a desk or chair leg to discharge any static energy safely.
Taking these precautions ensures not only your safety but also protects your device from further harm during the repair process.
- Assessing the Damage
Before diving into repairs, take a close look at your laptop screen. Examine it in good lighting to spot any cracks, scratches, or discoloration. This initial assessment is crucial.
Check for functional issues too. Are there dead pixels? Do you see flickering or strange lines? These signs can help determine the extent of the damage.
Don’t forget to test how the display responds to touch if you have a touchscreen model. Any lag or unresponsiveness could indicate more serious problems beneath the surface.
If you notice multiple issues, it might be time to consider replacement instead of repair. Document your findings by taking photos; this can assist with further evaluations whether you're going DIY or seeking professional help.
- Gathering Necessary Tools and Materials
To tackle a laptop screen repair, you'll need to gather specific tools and materials. Start with a small screwdriver set. Look for one that includes Phillips and flathead options, as these will help you access the screws securing your screen.
Next, consider a plastic spudger or prying tool. This handy gadget allows you to open the laptop casing without causing damage. It’s crucial for protecting the delicate components inside.
You’ll also require an anti-static wrist strap to prevent any static electricity buildup while working on your device. This can be essential in safeguarding sensitive hardware from electrostatic discharge.
Don’t forget replacement parts! Ensure you purchase a compatible screen model tailored for your specific laptop brand and series. Research beforehand to avoid mismatches that could complicate repairs down the line.
Keep microfiber cloths on hand for cleaning surfaces during assembly or disassembly. A clean workspace leads to better results!
- Replacing the Screen Yourself
Replacing your laptop screen can seem daunting, but with the right approach, it’s quite manageable. Start by carefully removing the bezel surrounding the screen. This often involves gently prying it away using a plastic tool to avoid scratches.
Once you’ve exposed the screws holding the display in place, remove them and disconnect any cables attached at the back. Take your time here; rushing could damage delicate components.
With everything disconnected, replace the damaged screen with a new one that matches your laptop model. Reattach all cables securely and screw everything back into position.
Snap on the bezel again and power up your device. If all goes well, you should see a crisp display come to life! Remember to keep track of every step for future reference or if you need to troubleshoot later on.
Cost Comparison: DIY vs Professional Repair/Replacement Services
When considering a laptop screen repair, the cost can vary widely depending on your approach. Tackling it yourself typically involves purchasing just the replacement screen and necessary tools. This option might set you back anywhere from $50 to $200, depending on your laptop model.
However, going the DIY route means taking on risks. Mistakes in installation could lead to further damage or even void warranties.
On the flip side, professional repair services often charge between $150 and $300 for labor and parts combined. While this option is pricier upfront, you gain peace of mind knowing that an expert handles everything.
Weighing your budget against your confidence in tackling repairs will guide your decision-making process effectively.
When to Replace Instead of Repairing
Sometimes, repair isn't the best option. If your laptop screen is extensively cracked or shattered, replacement may be more practical. A minor scratch can often be fixed, but deep cracks might compromise internal components.
Consider the age of your device. If it’s nearing obsolescence, investing in repairs could be a waste of time and money. Newer models offer better technology and performance.
If you notice persistent issues after a repair attempt—like flickering or discoloration—it signals that replacing the screen is necessary. Frequent problems can lead to frustration and reduced productivity.
Assess costs carefully. If professional repairs exceed 50% of a new screen's price, opt for replacement instead. It could save you hassle down the road while giving your device a fresh start.
Tips for Maintaining Your Laptop Screen
To keep your laptop screen in top shape, make cleaning a priority. Use a microfiber cloth and gentle cleaner designed for electronics. Avoid household cleaners that can damage the surface.
Be mindful of where you place your laptop. Heat sources and direct sunlight can cause screen deterioration over time. Consider investing in a protective case or sleeve when transporting it.
Adjust brightness settings to reduce strain on the display during extended use. This not only helps preserve the integrity of the screen but also enhances battery life.
Avoid eating or drinking near your device to prevent accidental spills that could lead to costly repairs.
Consider using a blue light filter app or glasses to protect your eyes from prolonged exposure while keeping an eye on any potential flickering issues with the display itself.
Conclusion
Repairing or replacing a damaged laptop screen can seem daunting at first, but it’s definitely manageable with the right knowledge and tools. Understanding the importance of your laptop screen is crucial; it's not just a display but a gateway to productivity and entertainment.
Identifying signs of damage early on, whether they be cracks, flickering images, or dead pixels, allows for timely action. If you choose to repair it yourself, remember to prioritize safety and gather all necessary materials before starting. Conversely, if the task feels overwhelming or beyond your skill set, professional services may save time and assure quality results.
Cost comparisons between DIY repairs and hiring professionals often show that while doing it yourself can save money upfront, ensuring proper installation might justify spending extra on expert help in some cases. Moreover, knowing when replacing rather than repairing makes sense could spare you future headaches.
Maintenance cannot be overlooked either—simple habits like keeping your laptop clean and using protective gear can prolong its lifespan significantly. A little care goes a long way in preserving functionality.
Navigating through this process equips you with useful skills for future tech dilemmas too. Whether you decide on repair or replacement ultimately depends on individual circumstances—and taking action promptly will ensure you're back to enjoying seamless computing experiences sooner rather than later.


Comentarios