


More from George Alice
More in Politics

Related Blogs

Archives
Social Share
When installing a polycarbonate roof on your home or business keep the following three important factors in mind:
Body
Two people can complete the installation of the Toiture Polycarbonate cover in less than two hours with standard tools and techniques.
Installation is simple and straightforward, and it takes only a few minutes.
Because of its high impact resistance, is an excellent choice for this application. It also provides excellent insulation while still allowing for the passage of light through the material.
The instructions that come with the cover make it simple to put it on your vehicle. With only two people and no professional equipment, you can have your pergola, awning, and other structures up and running in a matter of hours. . . . It now has the durability and aesthetics that it deserves as a result of this transformation.
Manufacturing Toiture Polycarbonate roof sheets is a simple process that requires little expertise.
They are available in two different flavors: creamy and clear, and you can choose between the two. In order to lay them properly, regardless of their color or size, the first step is always the same: they must be properly prepared. Therefore, after carefully peeling away the protective plastic from the top and bottom of the plate by a few centimeters, you must apply micro-perforated tape to the bottom of each plate and another full piece of tape to the top of each plate in order to prevent the plates from adhering to one another.
The installation of a profile base has been completed to the greatest extent possible.
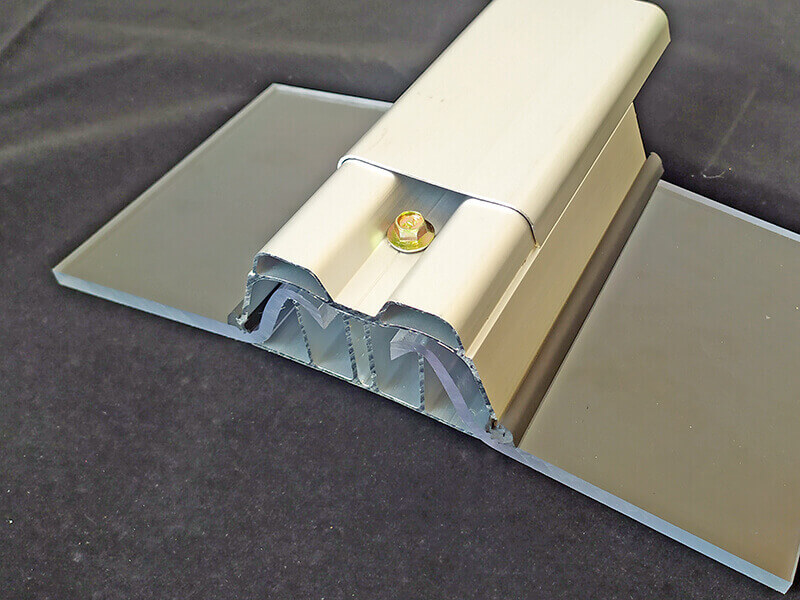
After you have completed this preparation, you will be able to install the first element on the structure, which is the profile base or cover, after you have completed this step. Once you have completed this step, you will be able to continue with the next step. Next, at 30-centimeter intervals, tighten the border outline around the entire surface that will be covered until it is completely enclosed. Finish this step by screwing the stopper into the end of the profile to ensure that the lid is securely fastened in place. (See the accompanying illustration for more information. )Keep in mind that you must drill holes in your plate in order for rainwater to freely flow through it.
In this method, Toiture Polycarbonate panels are installed on a wall or other surface.
The time has finally come to get down to business and actually install the Toiture Polycarbonate roof cover. Consequently, it is recommended that the side of the window that has been treated with UV light be placed so that Toiture Polycarbonate faces the exterior of the structure. When you have finished with one profile, you can move on to the next. Insert the plate into the edge profile that has already been installed and clamp it into a second profile that has been screwed onto the other side of the plate to finish up your installation. As a result, this operation can be repeated as many times as necessary to completely cover the total surface area of the roof, if necessary. Also worth noting is the fact that, in order to make use of this cover, it is necessary to add contouring or connecting covers between each new board that is inserted into the system.
Following the installation and tack-down of all of the boards, the only thing that remains is to remove the protective plastic film that was required to be applied to the outside of the cover in order to protect it.
In order to complete the decking installation, tap the decking down with a mallet and wrap the sealing profile around the circumference of the roof's perimeter. After that, you must drill holes every 15 to 20 cm in the louver profiles to ensure that the cells receive adequate ventilation. This will take approximately 30 minutes. It will take approximately 30 minutes to complete this task. Remember that the new profile models are free of seals, which is a welcome improvement over the previous models. Finally, on a sloped roof, a screw-in ridge should be installed in order to prevent leaks from forming.


Comments