A Step-by-Step Guide to Wiring a Power Distribution Block
Corps
Understanding the importance of a power distribution block
Before we dive into the nitty-gritty of wiring a power distribution block, it's essential to understand why it is an important component in any electrical system.
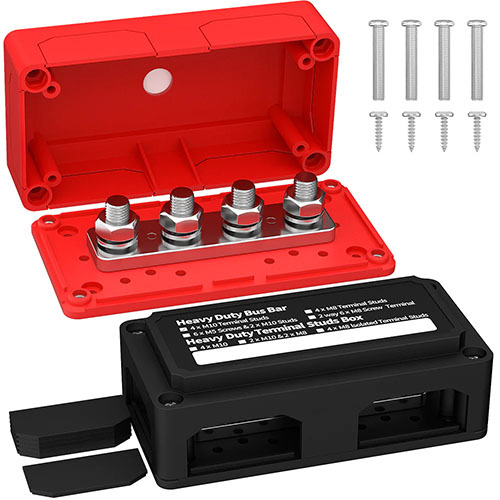
A power distribution block serves as a central hub for distributing power to various electrical devices or circuits. It allows you to connect multiple wires from the power source and distribute them efficiently to individual components, such as lights, switches, or electronic devices.

One of the key benefits of using a power distribution block is that it simplifies the wiring process and reduces clutter. Instead of having multiple wires running directly from the power source to each device, you can consolidate the connections in one convenient location. This not only saves time during installation but also makes troubleshooting and maintenance easier in the long run.
Furthermore, a power distribution block provides a safe and organized way to distribute power. It comes equipped with built-in terminals or busbars, which securely hold the wires and prevent loose connections. This eliminates the risk of short circuits or overheating caused by frayed wires.
Having a power distribution block also allows you to expand or modify your electrical system effortlessly. With the ability to add or remove wires easily, it provides flexibility for future upgrades or changes in the system.
Gathering the necessary tools and materials
Now that you understand the importance of a power distribution block, it's time to gather the necessary tools and materials for the wiring process. Having the right tools and materials will ensure a smooth and efficient installation.
Here's a list of the essential tools and materials you'll need:
- Power distribution block: Choose a block that is compatible with your electrical system and has enough terminals or busbars to accommodate your wires.
- Screwdriver: You'll need a screwdriver to secure the wires to the terminals or busbars. Depending on the type of screws used, you may need a flathead or Phillips screwdriver.
- Wire strippers: These will come in handy for removing the insulation from the wires, allowing for proper connections to the power distribution block.
- Wire cutters: Use wire cutters to trim the wires to the desired length and remove any excess.
- Electrical tape: Electrical tape will help secure the wires and provide insulation, preventing any short circuits.
- Wire connectors: These connectors will allow you to join wires together and make secure and reliable connections.
- Wire markers: Use wire markers to label the wires and maintain clarity in the wiring system.
Step-by-step guide to wiring a power distribution block
In this section, we will guide you through the step-by-step process of wiring a power distribution block. Follow these instructions carefully to ensure a successful and safe installation.
Step 1: Start by turning off the power supply to the area where you will be working. This will prevent any accidents or electrical shocks.
Step 2: Using your wire strippers, carefully strip about half an inch of insulation from the ends of the wires that will be connected to the power distribution block. Make sure to strip the appropriate length to ensure a secure connection.
Step 3: Insert the stripped end of each wire into a wire connector. Twist the connector clockwise until it is secure. Repeat this step for all the wires that will be connected to the power distribution block.
Step 4: Take your power distribution block and identify the terminals or busbars where the wires will be connected. Loosen the screws on these terminals or busbars using the appropriate screwdriver.
Step 5: Insert the wires into their respective terminals or busbars on the power distribution block. Tighten the screws to secure the wires in place. Double-check to ensure that all connections are tight and secure.
Step 6: Once all the wires are connected, use electrical tape to wrap around each wire connection. This will provide extra insulation and ensure no bare wires are exposed.
Step 7: Finally, turn on the power supply and test the connections to ensure everything is working correctly. If any issues are detected, double-check your connections and troubleshoot accordingly.
Safety precautions to observe during the process
When working with electricity, safety should always be the top priority. Here are some important precautions to keep in mind during the wiring process:
- Wear protective gear: Before starting any electrical work, make sure to wear safety glasses and insulated gloves. These will protect you from potential electrical shocks or injuries.
- Turn off the power: As mentioned before, always turn off the power supply to the area where you will be working. This will significantly reduce the risk of electrical accidents.
- Use proper tools: Ensure that you are using the correct tools for the job. This includes wire strippers, screwdrivers, and pliers with insulated handles. Using the wrong tools may cause damage or pose a safety hazard.
- Inspect the wires: Before stripping the insulation, inspect the wires for any signs of damage, such as fraying or exposed copper. If you notice any, replace the wire immediately to avoid electrical problems down the line.
- Check for live wires: Even with the power supply turned off, it is still possible to encounter live wires. Use a digital multimeter to test for any live wires before proceeding with the installation.
- Avoid overloading: Be mindful of the power distribution block's capacity and the total load it will be handling. Overloading the block can lead to overheating and potential electrical hazards.


commentaires