DAPI Spectrum Analysis: Insights into Nuclear Staining Techniques
Body
Fluorescence microscopy has revolutionized the field of cellular biology, allowing scientists to visualize and study intricate cellular structures with remarkable clarity. Among the various fluorescent stains available, DAPI (4',6-diamidino-2-phenylindole) stands out for its ability to selectively bind to DNA, making it an invaluable tool for nuclear imaging. This article explores the fluorescence dapi spectrum and how it facilitates DNA imaging.
The Unique Properties of DAPI
DAPI is a fluorescent dye that binds strongly to A-T rich regions in the minor groove of double-stranded DNA. Upon binding to DNA, DAPI undergoes a significant enhancement in fluorescence, making it an excellent marker for nuclei. This property is particularly useful in various applications, including cell cycle analysis, apoptosis studies, and chromosome visualization.
Understanding the Fluorescence Spectrum
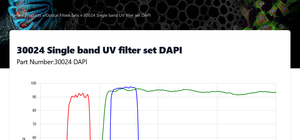
The fluorescence properties of DAPI are defined by its excitation and emission spectra. When excited by ultraviolet (UV) light, DAPI exhibits an excitation peak at approximately 358 nm. This UV excitation causes the dye to emit blue fluorescence with an emission peak around 461 nm. The distinct separation between the excitation and emission wavelengths allows for effective filtering, minimizing background noise and enhancing signal clarity.
Optimizing DAPI Imaging
Achieving optimal imaging with DAPI requires careful consideration of several factors:
-
Excitation Source: The light source used in fluorescence microscopy must provide sufficient UV light to excite DAPI effectively. Common sources include mercury vapor lamps, xenon lamps, and UV LEDs. Ensuring that your microscope’s light source aligns with DAPI’s excitation peak is crucial for maximum fluorescence intensity.
-
Filter Sets: Proper filter sets are essential to separate the excitation light from the emitted fluorescence. DAPI-specific filter cubes are designed to transmit the emitted blue light while blocking the excitation UV light, thereby reducing background and enhancing the signal-to-noise ratio.
-
Sample Preparation: The quality of sample preparation can significantly impact the fluorescence signal. Proper fixation and permeabilization are critical to allow DAPI to penetrate and bind to DNA. Over-fixation or insufficient permeabilization can result in weak or uneven staining.
Applications in Multicolor Imaging
In multicolor fluorescence imaging, multiple fluorophores are used to label different cellular components simultaneously. DAPI’s blue emission can overlap with other blue-emitting dyes, so it’s essential to choose fluorophores with distinct spectra and use appropriate filter sets to distinguish between them. For example, pairing DAPI with green-emitting fluorophores (like FITC) or red-emitting fluorophores (like Texas Red) allows for clear separation and visualization of multiple targets within the same sample.
Tips for Successful DAPI Staining
-
Concentration and Incubation: A typical working concentration for DAPI is between 0.1-1 µg/mL, with an incubation time of 5-10 minutes. Finding the optimal concentration and incubation time for your specific application can enhance staining quality.
-
Washing: Adequate washing after staining is necessary to remove unbound DAPI, which can contribute to background fluorescence. Using phosphate-buffered saline (PBS) for washing is recommended.
-
Mounting Media: Choosing the right mounting medium is crucial for preserving fluorescence. Anti-fade mounting media can help reduce photobleaching, maintaining fluorescence intensity over longer periods.
Troubleshooting Common Issues
-
Weak Signal: If the fluorescence signal is weak, check the alignment and intensity of the UV light source, and ensure that the DAPI concentration and incubation time are appropriate.
-
High Background: High background fluorescence can often be reduced by optimizing washing steps to remove excess unbound DAPI and using high-specificity mounting media.
-
Photobleaching: To minimize photobleaching, reduce exposure to intense light during imaging and consider using anti-fade reagents.
Conclusion
DAPI’s unique fluorescence properties make it an indispensable tool for DNA imaging in fluorescence microscopy. By understanding and optimizing the excitation and emission spectra, along with careful sample preparation and imaging conditions, researchers can achieve high-quality nuclear staining and clear, detailed images of cellular structures. Exploring the fluorescence spectrum of DAPI opens a gateway to precise and insightful DNA imaging, advancing our understanding of cellular biology.


Comments