


Transform Your Space: The Ultimate Guide to Choosing the Perfect Wall Monitor Mount!
In today’s world, where remote work and home offices have become the norm, the importance of an organized and efficient workspace cannot be overstated. One of the most effective solutions for optimizing your workspace is the use of a wall monitor mount. These mounts not only help save valuable desk space but also promote better ergonomics, allowing you to adjust your monitor to eye level, which can significantly reduce neck and back strain. Furthermore, a well-installed wall monitor mount can enhance the aesthetics of your space, making it look modern and clean. In this guide, we will explore how to choose and install the perfect wall monitor mount for your needs, ensuring that you can work comfortably and stylishly.
Understanding Wall Monitor Mounts
A wall monitor mount is a device that allows you to attach your monitor to a wall, freeing up desk space and providing better viewing angles. There are several types of wall monitor mounts available, each catering to different needs and preferences. Fixed mounts hold the monitor in a stationary position, while tilting mounts allow you to adjust the angle of the monitor to reduce glare. Full-motion mounts offer the most flexibility, allowing you to move the monitor in various directions, which is ideal for collaborative spaces or multi-angle viewing. When choosing a wall monitor mount, it's crucial to consider features such as weight capacity, which indicates how much weight the mount can support, compatibility with monitor sizes, and VESA standards, which ensure that the mount will fit your monitor's mounting holes. Understanding these elements will help you make an informed decision and ensure the safety of your setup.
Factors to Consider When Choosing a Wall Monitor Mount
When selecting a wall monitor mount, several key factors can influence your choice:
- Monitor Size and Weight: It's essential to check the weight and size of your monitor to ensure that the mount you choose can support it. Most mounts specify the maximum weight they can handle.
- Wall Type and Mounting Surface: Consider the type of wall you will be mounting the monitor on, as drywall, concrete, and brick require different mounting techniques and hardware.
- Viewing Angles and Ergonomics: Think about how you will be using your monitor. If you often work with multiple people or move around, a full-motion mount may be the best option.
- Installation Complexity: Some mounts are easier to install than others. If you're not handy, you might want to choose a simpler model or hire a professional.
- Aesthetic Preferences: Lastly, consider how the mount will fit into your overall design scheme. There are various styles and colors available to match your decor.
By keeping these factors in mind, you can select a wall monitor mount that not only fits your monitor but also meets your functional and aesthetic needs.
Installation Tips for Wall Monitor Mounts
Installing a wall monitor mount may seem daunting, but with the right approach, it can be a straightforward process. Here’s a step-by-step guide to help you:
- Measure and Mark: Start by measuring the height at which you want your monitor to be mounted. A good rule of thumb is to have the top of the screen at eye level when seated. Use a pencil to mark the desired height on the wall.
- Find the Studs: Use a stud finder to locate the wooden studs in your wall. Mounting your monitor on a stud is crucial for stability and safety.
- Level the Mount: Once you’ve marked the stud locations, hold the mount against the wall and use a level to ensure it’s straight. Mark where the screws will go.
- Drill Holes: Depending on your wall type, drill holes where you marked. If you’re mounting on drywall without a stud, you may need to use wall anchors.
- Attach the Mount: Secure the mount to the wall using screws and a screwdriver. Make sure it is tightly fastened.
- Hang the Monitor: Finally, attach your monitor to the mount following the manufacturer’s instructions and ensure it’s secure.
Always prioritize safety during installation. If you're unsure about any step, it’s wise to consult a professional to avoid damage or injury.
Common Mistakes to Avoid
When it comes to selecting and installing wall monitor mounts, there are several common pitfalls that many individuals encounter:
- Choosing the Wrong Size: One of the most frequent mistakes is selecting a mount that doesn’t match the size or weight of the monitor. Always double-check compatibility.
- Poor Placement: Installing the mount at the wrong height can lead to discomfort and strain. Take time to measure and consider your seating arrangement.
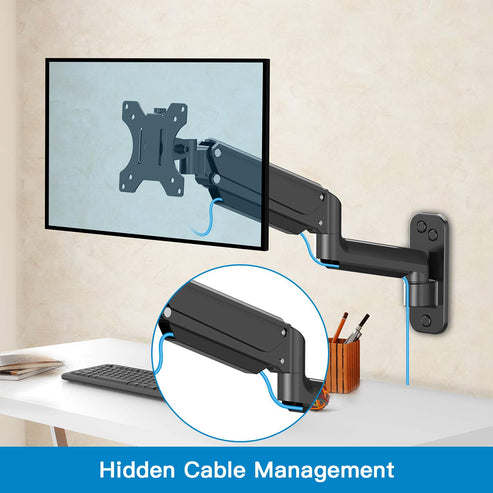
- Overlooking Cable Management: Neglecting to plan for cable management can result in a cluttered look. Consider how you will route and secure cables to keep your space tidy.
Avoiding these mistakes will ensure a smoother installation process and a more functional workspace.
Final Thoughts on Wall Monitor Mounts
In conclusion, choosing and installing the right wall monitor mount can significantly enhance both the functionality and aesthetics of your workspace. By understanding the different types of mounts, considering key factors, and following proper installation techniques, you can create a comfortable and efficient environment. Take the time to assess your specific needs, and transform your workspace into a more organized and visually appealing area that promotes productivity.


تعليقات