


More from Nilam Mehra


More in Politics

Related Blogs
Archives
Social Share
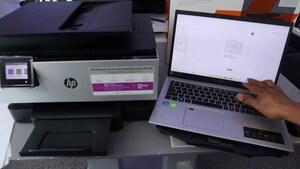
How to Set Up an HP Printer to Wi-Fi Step Wise Method
Body
Setting up your HP printer to connect wirelessly to your Wi-Fi network can provide you with convenient printing capabilities from any device within range. Whether you have a new HP printer or want to switch from a USB connection to a wireless one, this step-by-step guide will walk you through the process of How to setup hp printer to wifi
1. Preparation and Requirements
Before starting the setup process, ensure you have the following:
- An HP printer with wireless capabilities.
- Wi-Fi network details (network name and password).
- A computer or mobile device connected to the same Wi-Fi network.
2. Connect the Printer to Power
Plug in your HP printer to a power source and turn it on. Ensure that it is in a location within range of your Wi-Fi network.
3. Access the Printer's Control Panel
Locate the control panel of your HP printer. The control panel is typically located on the front of the printer and features buttons and a display screen.
4. Select Wi-Fi Setup Wizard
On the control panel, navigate to the "Setup" or "Network" menu. Look for the "Wireless Setup Wizard" or "Wi-Fi Setup Wizard" option and select it.
5. Choose Your Network
The printer will scan for available Wi-Fi networks. Once the scan is complete, a list of networks will be displayed on the printer's control panel. Select your Wi-Fi network from the list.
6. Enter Wi-Fi Password
If your Wi-Fi network is password-protected, you will be prompted to enter the network password. Use the printer's control panel or keypad to enter the password. Take care to enter the password accurately as it is case-sensitive.
7. Complete the Setup
After entering the Wi-Fi password, the printer will attempt to connect to your Wi-Fi network. Once the connection is established, the printer will display a confirmation message or an indicator light to signify a successful connection.
To verify that the printer is connected to the Wi-Fi network, you can print a network configuration page or perform a test print from a connected device.
Congratulations! You have successfully set up your HP printer to Wi-Fi. You can now enjoy wireless printing convenience from your computer, laptop, smartphone, or tablet.
123 HP Printer Setup: A Comprehensive Guide
Setting up your 123 HP printer is the first step towards enjoying seamless printing functionality. Whether you have just purchased a new 123 HP printer or need to reinstall and set up an existing printer, this comprehensive guide will walk you through the process. Follow these step-by-step instructions to ensure a successful 123 HP printer setup.
Start by unboxing your 123 HP printer and carefully removing all packaging materials. Make sure you have all the components, including the printer, power cord, ink cartridges, and any accompanying documentation. Place the printer on a sturdy and flat surface near your computer.
Connecting the Printer
Connect the power cord to the back of the printer and plug the other end into a power outlet. Power on the printer and wait for it to initialize. Follow the instructions displayed on the printer's control panel, if any, to set the language, date, and time.
Installing Printer Software
Insert the installation CD that came with your 123 HP printer into your computer's CD/DVD drive. If your computer doesn't have a CD/DVD drive, you can visit the 123 HP website and download the latest printer software for your specific printer model. Follow the on-screen prompts to install the software.
Connecting to Wi-Fi
If your 123 HP printer supports wireless connectivity, you can connect it to your Wi-Fi network for convenient printing from multiple devices. Use the printer's control panel to navigate to the wireless setup menu. Select your Wi-Fi network from the available networks and enter the network password when prompted. Once connected, your printer will have Wi-Fi access.
Printing a Test Page
After completing the setup process, it's recommended to print a test page to ensure that your 123 HP printer is working correctly. Open a document or photo on your computer and select "Print." Choose your 123 HP printer from the list of available printers and click "Print." Verify that the printed page matches the document or photo and that the printer is functioning properly.
Congratulations! You have successfully configure 123 HP printer setup. You can now start printing documents, photos, and other materials with ease.


Comments