Body
Data management and organization are critical in today's digital world. Businesses and individuals often use a variety of file formats, including CSV (comma separated values) files, which are often used to store tabular data. However, sometimes there is a need to convert CSV data to PST (Personal Storage Table) format. Microsoft Outlook uses the PST file format to store emails, contacts, calendar events, and other data. This article will guide you through the process of converting multiple CSV files to PST, which will make data management easier and more accessible.
How to Convert Multiple CSV Files to PST Format?
In the following content, we will explain the detailed process of converting CSV to PST format. Read the process correctly and then make the switch.
Step 1: Collect your CSV file
Before you begin, make sure all the CSV files you want to convert are in a folder. These files may contain a variety of data, including contacts, calendars, and even email-related information.
Step 2: Prepare your data
You may need to prepare or arrange your CSV file based on the type of data it contains. Make sure column headers and data are properly aligned. For example, if you're working with contacts, make sure each column reflects a different attribute, such as "name," "email," "phone number," etc.
Step 3: Use Microsoft Outlook
Microsoft Outlook has the ability to import data from a variety of sources, including CSV files. The specific method is as follows:
Start Microsoft Outlook: Start the Outlook program on your PC.
To use the Import Wizard, follow these steps: Navigate to the File tab and select Open and Export and Import/Export. The Import and Export Wizard will start.
Choose to import from another program or file: Select Import from another program or file, and then click Next.
Comma-separated values: Select Comma-separated values as the import file type. Select Next.
Click Browse to go to the folder where the CSV file is saved. Select the file you want to import and press "Next".
Map fields: Outlook prompts you to map the fields in the CSV file to Outlook fields. Make sure that each column in the CSV file corresponds to the associated Outlook field (e.g. Name -> Name, Email -> Email). Once the mapping is complete, press the "Next" button.
Import complete: Check your preferences and click Finish to begin the import process. Outlook will import the data in the CSV file into the folder of your choice.
Step 4: Export to PST
After importing CSV data into Outlook, you can easily generate a new PST file to preserve all imported information:
Create a new PST: In Outlook, right-click a primary folder (such as your email address) and select New Folder. Name the folder and click New Outlook Data File. To generate a PST file, just follow the steps below.
Drag the imported data from the imported folder to the newly formed PST folder.
Is this process suitable for converting multiple CSV to PST?
Manually converting CSV files to PST (Personal Storage Table) format may have several disadvantages, such as:
- Missing or inaccurate data
- Missing relationships
- Complexity
- Attachment handling
- Time consuming
- Error-prone
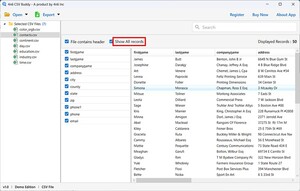
These are the most common disadvantages of manually converting multiple CSV files to PST. To overcome these problems, it is recommended to use professional CSV Converter Software. Using this application, you can convert unlimited CSV files to PST without Outlook and all properties. With this app, you can easily preview and convert CSV contacts including attachments and other data.
In conclusion
Converting multiple CSV files to PST format can help you manage your data more easily, especially when you use Microsoft Outlook to handle emails, contacts, and calendar events. You can follow the methods provided in this article to effectively transform and organize your data, ensuring smooth access and improving productivity. Mastering this technology, whether you are a business professional or an individual user, is sure to improve your data management capabilities.


Comments