How to knit a reverse yarn over
Body
In the expansive universe of knitting, learning new techniques can be a journey of delightful surprises. A perfect example is the reverse yarn over (RYO), a specialized knitting technique that adds a touch of flair to lacework patterns. Today, let's dive into the world of RYOs and see how you can master this technique.
An Introduction to the Reverse Yarn over Technique
The reverse yarn over technique is a knitter's delight, especially when creating intricate lacework. Unlike the traditional yarn over where the yarn is wrapped to the back of the needle, the reverse yarn over brings the yarn to the front over the needle. This little switch creates a larger loop, resulting in a pronounced hole that lends a unique texture to the knitted piece.
Mastering the Reverse Yarn over: A Step-by-Step Guide
To knit a reverse yarn over, you need just your knitting needles. Let's walk through the process:
- Setting the Stage: Begin with your yarn at the back of your work. Say, for example, use your single pointed knitting needle, and bring the yarn to the front.
- Loop Formation: Next, wrap the yarn over the top of your needle, forming the crucial loop that will create the reverse yarn over.
- Loop Transfer: Once you've formed the loop on your needle, you need to transfer it onto your right-hand needle. And voila, you've created a reverse yarn over!
- Continuing with Your Pattern: Now that your reverse yarn over is in place, you can continue with your knitting pattern as per the instructions.
Yarn over vs. Reverse Yarn Over
Knitting is a world full of varied techniques, each adding its unique touch to the final piece. Two such techniques, which might sound similar but have different effects, are the yarn over (YO) and the reverse yarn over (RYO). Even though their names are alike, these techniques create different results, greatly changing the look and feel of your knitted work.
A professional knitter knows the importance of these techniques and their strategic application in different knitting scenarios. From enhancing a lace pattern to introducing a unique design element, the choice between YO and RYO could be instrumental. Understanding their individual characteristics and the aesthetic each imparts to a knitted piece is essential for any serious knitting enthusiast.
The Traditional Yarn Over
The yarn over is one of the basic techniques in knitting, widely used to create decorative holes or to make simple increases. To perform a YO, the yarn is wrapped over the right-hand knitting needle from back to front before you work the next stitch. This action creates an extra loop on the needle, resulting in an additional stitch. When worked on subsequent rows, this extra stitch forms a hole, often used in lace patterns or eyelet designs.
Introducing the Reverse Yarn Over
On the other hand, the reverse yarn over is a slight variation of the traditional yarn over. Instead of wrapping the yarn from back to front, the yarn is brought to the front of the work and then looped over the right-hand needle to the back. This creates a larger loop on the needle, which results in a larger hole when worked on the following row. The RYO technique is especially useful when a more pronounced hole is desired in the fabric, often in more intricate lace patterns or specific decorative elements.
Comparing the Two Techniques
While both techniques involve creating an extra loop on the needle, the direction in which the yarn is wrapped around the needle is what sets them apart. This difference might seem minor, but it significantly affects the size of the hole produced in the fabric, with RYO producing a noticeably larger hole than a standard YO.
Furthermore, RYO is a bit more advanced and requires careful attention while working subsequent stitches to prevent twisting. YO, being simpler, is often one of the first increase techniques new knitters learn.
Conclusion: Embracing Diversity in Techniques
Both yarn over and reverse yarn over techniques are essential in the repertoire of every knitter. Understanding the differences between these techniques can open up a wider range of possibilities for your knitting projects. Whether you're aiming for delicate eyelets with traditional yarn overs or larger, more pronounced lacework using reverse yarn overs, these techniques allow you to add a unique touch to your knitted pieces. So, why not pick up your knitting needles and explore these techniques today? The diversity they bring to your knitting is well worth the effort.
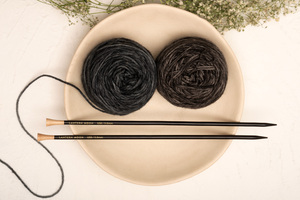
With the Lantern Moon Collection's premium knitting needles, your crafting experience is bound to be enjoyable. These needles and hooks, along with some accessories, are carefully made by hand from high-quality ebony wood. They have a super-smooth finish, allowing your yarn to slide easily as you work on your stitches. Using this collection can make your knitting experience feel a little more special.
Source by- https://theamberpost.com/post/how-to-knit-a-reverse-yarn-over


Comments