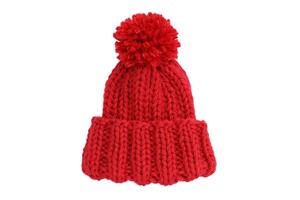
Beginner Guide to knit a Chunky Hat
Cuerpo
Embarking on the knitting journey can be really fulfilling for anyone who wants to try knitting for the first time. Your patience and dedication will unfold beautiful creations, such as the Chunky Hat. This simple, beginner-friendly project makes a heartfelt gift suitable for any occasion. Once you've mastered the fundamental stitches, holding knitting needles, and knitting techniques, you'll be able to knit for your loved ones and discover new things.
Imagine yourself creating this cozy Chunky Hat, a project that promises warmth and style. Whether you're a novice or an experienced knitter, the joy of crafting something with your own hands is incomparable. This blog is primarily written for those starting their knitting adventure, offering a step-by-step approach to a delightful Chunky Hat.
The Charm of Chunky Hats
What makes the Chunky Hat so appealing is its simplicity. This hat is designed with basic stitches and thick yarn, guaranteeing warmth and comfort. You can find the yarn at local craft stores or online, opening a world of possibilities for colors and textures.
Don't hesitate to let your creativity shine – add stripes, buttons, bows, or even a playful pom-pom on top. Once you grasp the fundamentals, let your imagination run wild, experimenting with different variations using your preferred best knitting needles.
Crafting the Chunky Hat in Just 2 Hours
You can complete this super stylish Hat in under two hours – a perfect winter project for those seeking quick and satisfying results. Gather the following materials:
Super Bulky Yarn/Worsted Weight Yarn
US 15 (10mm) Circular needle
US 15 (10mm) Double Pointed Knitting Needles
Stitch markers
Yarn needle
Getting Started: Abbreviations and Gauge
Before starting with the pattern, familiarize yourself with a few abbreviations:
k1: Knit one stitch
p1: Purl 1 stitch
k2tog: Knit two stitches together
Maintain a gauge of about two stitches per inch, ensuring the final measurement caters to the average teen to adult head circumference (21-23 inches).
Step-by-Step Guidelines
Casting On:
Using a circular needle of US size 15 (10mm), cast on 44 stitches. Insert a marker and join to work in the round.
Hat Brim/Body:
- Round 1: k1, p1; repeat all around.
- Continue Round 1 until the hat measures 10" from the cast-on edge or your desired length, including a 2.5" rolled-up cuff.
Decreasing Rounds:
- Round 2: k2tog; repeat throughout. Result: 22 stitches.
- Round 3: k2tog; repeat throughout. Result: 11 stitches.
Finishing Touch:
When you reach the last row, cut the yarn and thread the remaining 11 stitches through a yarn needle. Pull tightly, secure inside the hat, and weave in all ends.
Here are some helpful tips to enhance your experience;
- Yarn Choice: Opt for high-quality, soft yarn in super bulky or worsted weight for a cozy and comfortable hat.
- Needle Confidence: If you're a beginner, don't be intimidated by the size 15 (10mm) needles. Embrace the chunkiness; it makes the project progress quickly and adds to the hat's warmth.
- Gauge Matters: Take a moment to check your gauge before starting. Adjust your tension if needed to ensure the hat fits snugly and meets the intended measurements.
- Stitch Marker Placement: Place a distinctive stitch marker at the beginning of the round to track your progress easily. This simple marker will be your guide as you move through the pattern.
- Roll-up Cuff Length: Customize the length of the rolled-up cuff based on your preference. Some may prefer a shorter or longer cuff, so feel free to adjust according to your style.
- Perfect Your Decreasing: When working the decreasing rounds, ensure that your knit two stitches together (k2tog) stitches are neat. A well-executed decrease contributes to the overall polished look of the hat.
- Practice Makes Perfect: If you're new to knitting in the round or using circular knitting needles, don't get discouraged if it initially feels awkward. Practice will improve your skills, and soon, you'll knit easily.
This chunky hat project is perfect for those tight on time or looking for a festive knitting venture. As you progress, don't shy away from trying different needles, from single to double pointed or interchangeable to fixed circular knitting needles. Also, explore intricate stitch patterns to transform your creations into elaborate, captivating designs.
Source by- https://medium.com/@lanternmoonhandcrafted/beginner-guide-to-knit-a-chunky-hat-8e6c4d3e29ee


Comentarios