


More from Lantern Moon


More in Politics
Related Blogs

Archives
Social Share
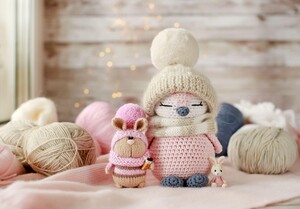
Easter Bunny Pattern For Beginners
Body
Are you excited about Easter and want to do something special this year? Why not try your hand at making an Easter bunny? We will teach you how your knitting needles can make this cutie with a dash of creativity.
This Easter bunny pattern is beginner-friendly. If you know how to knit, then you are already set, as this pattern only contains basic stitches. So, let's knit the Star of Easter: Bunny.
Knitted Bunny Pattern
Materials Needed:
- Yarn in your color choice
- 2 black beads for eyes
- Embroidery floss in black and light brown
- Set of 4 double pointed knitting needles, check yarn label to match the size
- Crochet hook
- Stitch marker
- Polyester filling or wool roving for stuffing
- Extra long wool needle
- Tapestry needle for seaming pieces
- 2 decorative buttons (diameter 5mm [0.2in])
Stitch Patterns:
Reverse stockinette: purl on the right side (RS), knit on the wrong side (WS)
Stockinette stitch: knit on RS, purl on WS
Abbreviations:
k: knit
p: purl
kfb: increase (knit in the front and back of stitch)
k2tog: knit two stitches together (decrease)
RS: right side
WS: wrong side
st(s): stitch(es)
Bunny Head:
Cast on 9 sts using crochet cast-on in the round. Distribute sts evenly onto 3 needles, but not on circular knitting pin (If using). Mark the start of the round with a stitch marker.
Round 1: kfb (9 times) (18 sts)
Round 2: stockinette stitch (18 sts)
Round 3: (kfb, k5) 3 times (21 sts)
Rounds 4 – 12: 9 rounds stockinette stitch (21 sts)
Round 13: (k2tog, k5) 3 times (18 sts)
Round 14: stockinette stitch (18 sts)
Round 15: 6 times (k2tog, k1) (12 sts)
Round 16: stockinette stitch (12 sts)
Round 17: k2tog 6 times (6 sts)
Round 18: stockinette stitch (6 sts)
Use wool roving or polyester filler and stuff tightly.
Cut the working yarn, pull through the last 6 stitches, and draw tightly. Hide the yarn tail inside the head, secure and trim the end.
Body:
The body is worked from the bottom up.
Using crochet cast-on in the round, cast on 6 sts. Distribute sts evenly onto 3 needles. Mark the start of the round with a stitch marker.
Round 1: kfb 6 times (12 sts)
Round 2: (kfb, k1) 6 times (18 sts)
Round 3: (kfb, k2) 6 times (24 sts)
Round 4: (kfb, k3) 6 times (30 sts)
Round 5: (kfb, k4) 6 times (36 sts)
Round 6: 6 times (kfb, k5) (42 sts)
Round 7: reverse stockinette (42 sts)
Rounds 8–16: 9 stockinette stitch rounds (42 sts)
Rounds 17–18: 2 rounds reverse stockinette (42 sts)
If you want, you can change the color or continue with the same color yarn.
Rounds 19–24: 6 rounds stockinette stitch (42 sts)
Round 25: k2tog, k5 twice, (k2tog, k12), and (k2tog, k5) twice (37 sts).
Round 26: (k2tog, k4) 2 times, k2tog, k11, (k2tog, k4) 2 times (32 sts)
Round 27: (k2tog, k3) 2 times, k2tog, k10, (k2tog, k3) 2 times (27 sts)
Round 28: stockinette stitch (27 sts)
Round 29: (k2tog, k2) twice, k2tog, k9, (k2tog, k2) twice (22 sts).
Round 30: (k2tog, k1) 2 times, (k2tog, k3) 2 times, (k2tog, k1) 2 times (16 sts)
Round 31: k4, (k2tog, k2) 2 times, k4 (14 sts)
Bind off 14 sts knit-wise and stuff the body. The upper edge of the body is still open.
Hands (make 2):
Cast on 4 sts. Knit in i-cord for 12 rounds (4 sts). Do not fill. Bind off 4 sts knit-wise. Hide one end inside the tube.
Sleeves (make 2):
Cast on 8 sts. Knit 12 rounds in stockinette stitch (8 sts). Bind off knit-wise.
Ears (make 2):
Cast on 7 sts. Work in stockinette stitch for 8 rows. Decrease as follows:
Row 9: k2, k2tog, k3 (6 sts)
Row 10: p6
Row 11: k2, k2tog, k2 (5 sts)
Row 12: p5
Row 13: k2, k2tog, k1 (4 sts)
Row 14: p4
Row 15: k2tog 2 times (2 sts)
Row 16: p2tog (1 sts)
Cut yarn. Draw the tail through the remaining stitch and pull tightly. Secure.
Legs (make 2):
Using crochet cast-on in the round, cast on 6 sts. Knit 13 rounds in stockinette stitch (9 sts). Do not fill. Bind off 9 sts knit-wise.
Embroidering a face:
Make the nose and mouth.
Assembling the Bunny:
Fold each ear in half and sew to the head. Sew eyes onto the face, head and legs to the body.
Insert arms into the sleeves and sew the top edge of the sleeves closed, attaching them to the arms. Then, sew the arms to the body.
Your easter bunny is ready now; feel free to deck it up with accessories such as a hat or scarf or even wrap it in clothes.


Comments