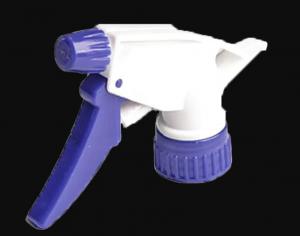
Disassembling The Lotion Pump Head
Body
This reliable tool staying right beside your kitchen sink only needs a simple finger pump to quickly dispense some soap. It has become a quite a handy accessory used by most families.
It can be annoying when one unfortunate morning you find out the pump is not working. It Most commonly, it is either that a spring is broken, or that there is a clog.
To make it function like normal again, you’ll first have to take apart the lotion pump head to investigate what the problem is. Just follow these simple tricks I’m about to discuss.
Disassembling the Dispenser
To disassemble the dispenser, you start with unscrewing pump part first. This is very simple and needs a minimal screwdriver matching your screw head.
Next, you apply a little bit of force and pull out the nozzle.
It’s time to use your entire body to control the pulling force for pulling off ring. Sorry to say, it’s quite sticky and tacky. You can use a good pair of gloves to keep your hands clean.
The soapy goop might be a reason for locking up dispenser. It needs a good amount of effort from your side.
Finally, it’s time to detach the middle part. Simply twist, pull and wiggle. At one point, it comes apart.
You’ll find a ball bearing at the very bottom of air chamber. This is a very important part to keep the dispenser working properly. So, store it carefully after dissembling the dispenser.
Fixing Soap Solidification (General Method)
Start filling the basin with hot water. If you are using a farmhouse sink, use warm water to fill it. Add around one tablespoon of bleach into the water. You’ll use it to sanitize the pump.
Now the pump should be attached to dispenser with screws. You need to unscrew them for gradually taking apart pump from dispenser.
Let the detached pump soak inside warm water. Keep it that way for around fifteen minutes. After the time period of soaking it properly, let water drain out from sink.
Now turn on the sink for some warm water to run. You need to hold the pump beneath running water. Do this for a couple of minutes.
While holding it, you will push the nozzle several times. This will help any old soap to simply purge out from the pump. Once you see that clean water is squirting out, stop rinsing the pump.
Now get a pipe cleaner. Use it for clearing away any logs that water failed to deal with. You simply need to insert the pipe into clear tubing of pump. Once again rinse the pump under water by pushing nozzle many times.
The pump should be clean by now. Simply put it back to the dispenser. Make sure to tighten the screws securely so that it does not come out next time you use it. Avoid overtightening, however.
Pump Trigger Jammed.
In some cases, when you press the pump’s trigger it denies to low down or move at all. There could be a number of reasons behind such an occurrence.
As a professional Perfume Spray Head for sale manufacturer,we accept all kinds of window hardware orders, welcome to consult.


Comments